Why RAW Photo Editing Matters (and How We Got Here)
A short history of RAW: where it came from, why professional photography adopted it, and why every Mac photo workflow still comes back to it.
In Short
RAW (definition). A RAW image file is a digital photograph stored as the minimally processed numerical output of a camera's image sensor. Each pixel value records the intensity of light measured by a single photosite (typically arranged in a Bayer color filter array) at a bit depth of 12, 14, or 16 bits per channel, prior to demosaicing, white balance, gamma correction, color space conversion, sharpening, noise reduction, or lossy compression. Because none of these decisions are baked into the file, a RAW image must be developed by software before it can be displayed, printed, or shared, and that development is non-destructive: the original sensor data is preserved and any edit can be revised at any later time without quality loss.
Table of Contents
Most photos you have ever liked, on Instagram, in a magazine, on a movie poster, started life as a RAW file. The polished image was the last step. The first step was a flat, dim, slightly weird-looking file that almost nobody ever sees, sitting on a memory card.
This is the short version of why that file exists, why working photographers refuse to give it up, and which tools they use to turn it into the version you actually look at.
What a RAW file actually is
When light hits the sensor in your camera, it gets recorded as raw electrical values, one for each photosite. A typical modern sensor records 12 or 14 bits of brightness per channel, which is anywhere from 4,096 to 16,384 distinct levels. That data is the RAW file. It is not really an "image" yet. It is a numerical recording of what the sensor saw.
To turn it into a JPEG, the camera has to do a lot of work: demosaic the sensor pattern into red, green, and blue pixels, apply white balance, apply a tone curve, sharpen, denoise, compress, and throw away most of the bits. By the time you see the JPEG on the back of your camera, it has been through about a dozen creative decisions, all made by the camera's firmware in a few milliseconds.
A RAW file skips all of that. It hands you the original numbers and asks you to make those decisions yourself, on a real screen, with real time to think about it. White balance, exposure, contrast, color, sharpening, none of it is committed yet.
The trade-off is size and convenience. A 24-megapixel RAW file is typically 25 to 50 MB. The JPEG version of the same shot might be 6 MB. RAW files cannot be opened by every viewer, every editor, every browser. They need a developer.
A short history of RAW
Late 1980s and early 1990s. The first cameras to capture digital sensor data were one-off scientific and press tools. The Kodak DCS-100 shipped in 1991 (a Nikon F3 with a digital back) and stored proprietary unprocessed data on a separate hard drive the photographer carried in a shoulder bag. The format was specific to Kodak. There was no Lightroom, no Photoshop plugin, no real workflow. RAW existed, but only inside small custom toolchains at newspapers like the Associated Press.
1999. The Nikon D1 launched as the first widely sold professional digital SLR at a price working photographers could justify. Its native format was NEF (Nikon Electronic Format), and it brought the idea of RAW out of research labs and into newsrooms and weddings.
2001 to 2002. Other manufacturers caught up. Canon's EOS-1D introduced the CRW format (later replaced by CR2 and now CR3). Fujifilm shipped RAF. Olympus shipped ORF. Sony eventually arrived with ARW. Each manufacturer treated their RAW format as proprietary, and each new camera tended to have a slightly different variant. This created a real problem: photographers found themselves locked to whichever editor the camera maker bundled.
2003. Thomas Knoll, the original author of Photoshop, wrote the Adobe Camera Raw plugin. For the first time, a photographer could open RAW files from almost any major camera in a single editor. Camera Raw was a pivot moment. It turned Photoshop into the most popular RAW developer on the planet, and it laid the engine that would later become Lightroom.
2004. Adobe released DNG (Digital Negative), an open, documented RAW format meant to solve the format-fragmentation problem. Some manufacturers (Leica, Pentax, Ricoh, and later Apple) adopted it directly. Others (Canon, Nikon, Sony, Fuji) kept their proprietary formats, but agreed to publish enough documentation that third-party editors could keep up.
2007. Adobe shipped Lightroom 1.0, the first mainstream tool built around the idea that you import a folder of RAW files, develop them non-destructively, and export the results. Lightroom did for photographers what iTunes did for music: it organized the chaos.
The 2010s. RAW became standard for any camera above the cheap end of the market. Cameras started shooting both RAW and JPEG by default, so casual users could share a JPEG immediately while serious users still had the RAW to develop later. Mirrorless cameras pushed RAW further, with formats like Fujifilm's compressed RAF and Sony's lossless ARW.
2020. Apple introduced ProRAW on the iPhone 12 Pro, the first time a phone shot a real, professional-grade RAW file (a 12-bit DNG with computational photography baked in). Android followed with broader DNG support across Pixel and Samsung flagships. RAW finally arrived in pockets.
Today. Almost every dedicated camera made in the last fifteen years can shoot RAW. Almost every flagship phone can too. The format is no longer an enthusiast's choice. It is the default for serious work.
Why it matters: the advantages
The reason photographers fight for RAW is that JPEG quietly throws information away, and you do not always know what you needed until later. RAW preserves all of it.
Bit depth. JPEG stores 8 bits per channel, which is 256 levels of brightness. RAW stores 12 or 14, which is 4,096 to 16,384 levels. That extra precision is invisible on a casual look at a finished photo, but it is the reason you can push exposure or pull shadows in a RAW file without seeing banding in the sky.
Exposure latitude. A modern RAW file gives you roughly two to three stops of headroom in highlights and three to four stops of recovery in shadows. JPEG gives you almost nothing. If you over-exposed a shot by a stop and a half, the RAW file probably has detail you can pull back. The JPEG does not.
White balance, after the fact. White balance in a JPEG is committed at capture. White balance in a RAW file is just metadata: a number you can change anytime. A photo shot under tungsten lights and accidentally set to "Daylight" can be fixed in one slider in RAW. In JPEG, you fight color casts forever.
Non-destructive editing. RAW developers do not modify the original file. They store edits in a sidecar (a small text file or a database), and re-render the image every time you view or export it. This means you can come back to a photo from five years ago and re-edit it with no loss. You can apply ten different looks to the same RAW and not pay a quality cost.
Better noise reduction and sharpening. Both algorithms work much better on the full sensor data than on an already-compressed JPEG. RAW noise reduction can save high-ISO shots that the camera's JPEG processor would have already smudged.
Future-proofing. The longer you keep a RAW file, the better the algorithms that develop it get. A photo shot in 2010 looks better in a 2026 RAW developer than it did in a 2010 one, because demosaicing, denoising, and lens-correction algorithms have improved dramatically. JPEG cannot benefit from any of that. The decisions baked in at capture time are permanent.
Adoption and popularity
RAW went from a niche professional tool to a near-universal standard in about twenty years. A few rough markers of how that happened:
- Working photographers (wedding, editorial, commercial) crossed over to RAW-only workflows around 2005 to 2008. By 2010, shooting JPEG-only at a paid shoot was considered amateur in most genres.
- Enthusiast cameras shipped RAW as a default in their menus from roughly 2012 onward. Most prosumer bodies even default to "RAW + JPEG" so users get both.
- Stock photography agencies started requiring RAW captures, or 16-bit TIFF derivatives of RAW, as the new century progressed. The major libraries explicitly reject heavily compressed JPEGs.
- Phones got real RAW support starting with iOS 10 (2016) and Android's Camera2 API (2014), but the breakthrough was Apple ProRAW in 2020 and Samsung's Expert RAW in 2021. Once flagships shipped RAW with computational photography, the format jumped from a few hundred thousand SLR owners to hundreds of millions of phone users overnight.
- Cinema followed the same arc. Cameras like the RED One (2007) and ARRI Alexa popularized RAW video. Apple's ProRes RAW arrived in 2018. Today most serious productions shoot some form of RAW.
The numbers vary by survey, but a fair estimate today is that the majority of serious still photographers shoot RAW exclusively, and a meaningful minority of phone users have at least tried ProRAW or Expert RAW. The format is no longer the question. The question is which tool to develop it in.
The tools people develop RAW with
The RAW editor market is one of the few categories in software where there are genuinely good options at every price point.
- Adobe Lightroom Classic is the dominant choice. It runs on Mac and Windows, has the deepest catalog (Library) features, supports almost every camera ever made, and is the default at most photo schools. Subscription only, currently $9.99 a month bundled with Photoshop in the Photography Plan.
- Adobe Camera Raw is the same engine as Lightroom but as a Photoshop plugin. Useful if you want a single-image workflow without a catalog.
- Capture One by Phase One is the high-end alternative. It is what fashion and product photographers tend to use, especially for tethered studio shooting. Per-camera color science is widely considered better than Lightroom's, particularly for Fujifilm files. About $24 a month or roughly $300 perpetual per major version.
- DxO PhotoLab is the technical photographer's pick, with the best lens correction database and arguably the best high-ISO denoising on the market (DeepPRIME). One-time purchase, around $230.
- ON1 Photo RAW and Luminar Neo are full-featured editors that emphasize creative looks and AI tools. Both are sold as one-time purchases or subscriptions, and both run natively on Apple Silicon.
- Apple Photos opens RAW files natively on macOS and iOS, with a respectable set of develop sliders. For casual ProRAW workflows it is genuinely good, and it is free.
- Affinity Photo ($70 one-time) includes a RAW develop persona that competes surprisingly well with the bigger names for single-image work.
- RawTherapee and darktable are the free, open-source options. Both are mature, both run on Mac, and both are actively maintained. The interface curve is steeper, but the output quality is professional.
- RapidPhoto, our app, opens RAW files from every major camera as part of a batch workflow. More on that below.
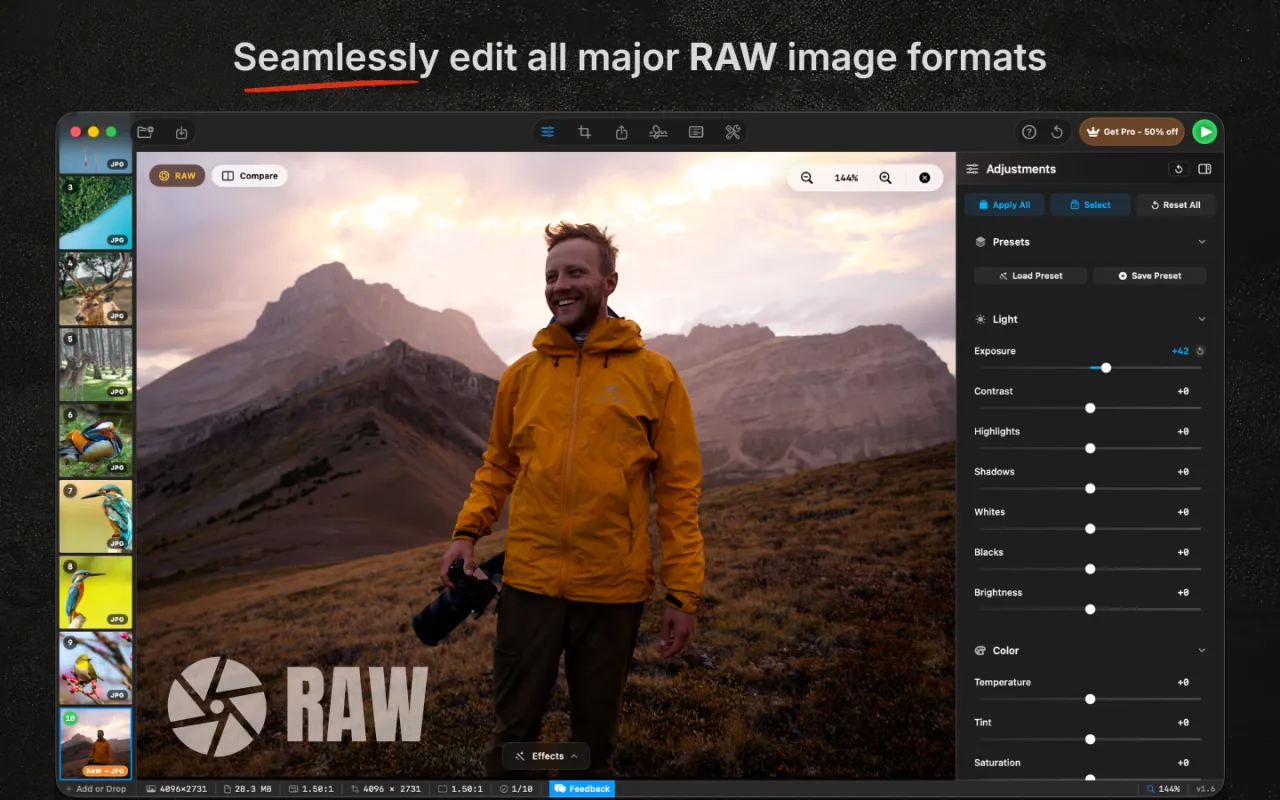
RAW in RapidPhoto
Most of the editors above are designed around developing one photo at a time, very carefully. That is the right tool when a single image needs to look perfect. It is the wrong tool when you have 400 RAW files from a wedding, an event, a product shoot, or a real-estate listing and you need them all delivered tonight.
RapidPhoto exists for that second case. It opens RAW files from every major camera and treats them as input to a batch pipeline:
- Canon CR2 and CR3
- Nikon NEF and NRW
- Sony ARW, SRF, and SR2
- Fujifilm RAF
- OM System and Olympus ORF
- Panasonic RW2
- Pentax PEF
- Leica and Adobe DNG (including Apple ProRAW)
- Hasselblad 3FR and FFF
- Phase One IIQ
- Sigma X3F
The pipeline is full 16-bit through every adjustment: exposure, contrast, highlights, shadows, whites, blacks, clarity, the color mixer, and the tone curve. You develop one image until it looks right, hit Apply All, and every other RAW in the batch picks up the same edit. Then you export the batch in one click as JPEG, AVIF, HEIC, TIFF, WebP, or any of the other nine formats RapidPhoto supports, with watermarks, renaming, and IPTC metadata applied along the way.
It runs entirely on your Mac (Apple Silicon native, GPU-accelerated through Core Image), opens 50 MB RAW files in milliseconds, and is a one-time $29.99 purchase with no subscription. Try it free with up to 10 images per batch. If you mostly need to develop one shot at a time, Lightroom or Capture One is still the right answer. If you mostly need to develop hundreds, RapidPhoto is built for exactly that.
Where RAW is going
RAW is not going away. If anything, it is getting deeper. Sensors keep gaining bit depth (16-bit RAW is now common on medium-format and high-end cinema). Phone RAW is getting smarter, with computational tricks (multi-frame stacking, deep noise reduction) baked into the file before you ever open it. AI denoise and AI lens correction are turning shots that would have been unusable in 2015 into print-quality work.
The format that started in a Kodak research lab as a workaround for storage limits has quietly become the default substrate of digital photography. Every major image you see, from a magazine cover to a friend's iPhone shot, increasingly starts as a RAW. The tool you use to develop it is your choice. The fact that you should keep the original is not.
If you are working through batches of RAW files on a Mac and most of your time goes into the same edit applied to many photos, that is the workflow RapidPhoto was designed for. Native Apple Silicon, every major RAW format, full 16-bit pipeline, one-time $29.99 with no subscription.
More from the blog
A Brief History of Photoshop
Two brothers, a Mac Plus, and 35 years of pixels
Best Batch Photo Editors for Mac in 2026
A head-to-head comparison of the top five
Complete Guide to Batch Photo Editing on Mac
Crop, resize, watermark, rename, export at scale
Batch Convert HEIC to JPEG on Mac
Three methods, free to professional